
In the world of oil painting, where colors blend and layers build to create depth and emotion, the initial stages often determine the success of the final piece. If you've ever found your paintings turning muddy, lacking vibrancy, or struggling with value contrasts, the issue might not lie in your palette choices but in your foundational approach. Enter subtractive underpainting—a technique that flips the traditional additive process on its head by starting with darkness and carving out light. This method, rooted in historical practices and beloved by contemporary artists, empowers painters to achieve professional-level results with greater ease and control. In this comprehensive guide, we'll explore what subtractive underpainting is, its rich history, undeniable benefits, step-by-step execution, and practical tips to integrate it into your workflow. Whether you're a beginner seeking structure or a seasoned artist aiming for more luminous works, mastering this technique could transform your art.

What is Subtractive Underpainting?
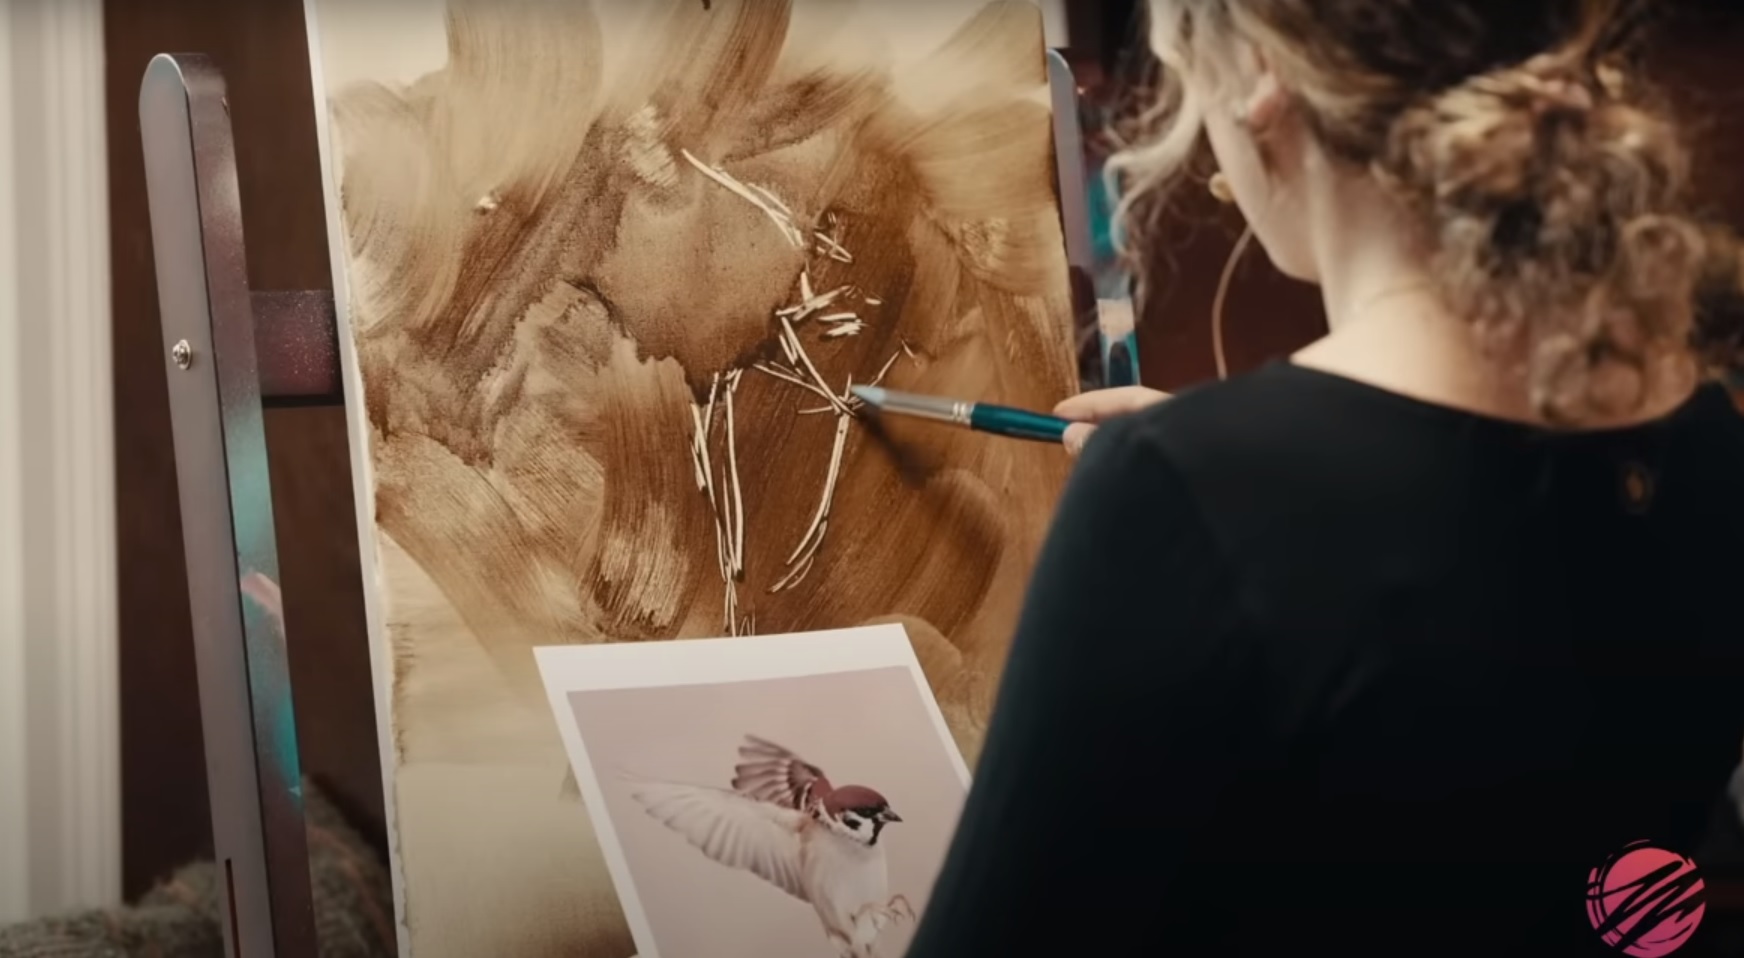
Subtractive underpainting is a preparatory technique in oil painting where the artist begins by applying a uniform layer of dark or mid-tone paint across the canvas, then selectively removes or "subtracts" portions of it to reveal lighter areas. This creates a monochromatic or limited-color foundation that establishes the composition's value structure— the interplay of lights and darks that gives a painting its form and depth. Unlike drawing with lines, this method focuses on massing shapes and tones, allowing for a more fluid and forgiving start.
The term "subtractive" draws from the idea of sculpting away material, much like a sculptor chisels stone to reveal form. Tools such as brushes, rags, erasers, or specialized wipe-out tools are used to lift paint, exposing the white canvas beneath or blending tones for subtle gradients. This approach is particularly effective in oils due to the medium's slow drying time, which permits extended manipulation.
A Brief History of Subtractive Underpainting
The roots of underpainting trace back to the Renaissance and Baroque eras, where masters like Leonardo da Vinci, Rembrandt, and Caravaggio employed layered techniques to build complexity in their works. While not always strictly "subtractive," these artists often used grisaille (a monochromatic underpainting in grays) or verdaccio (greenish tones) as a base, subtracting or glazing to refine details. For instance, Rembrandt's dramatic chiaroscuro effects—intense contrasts of light and shadow—were achieved through dark underlayers from which highlights emerged, creating a sense of illumination from within the canvas.
During the Baroque period, subtractive methods gained popularity for their efficiency in capturing dynamic lighting, as noted in historical treatises on painting. In modern times, artists like those at the Milan Art Institute have revitalized the technique, emphasizing its accessibility for beginners. Contemporary educators, such as David M. Kessler in his blog on subtractive painting, highlight how it echoes these classical approaches while adapting to today's fast-paced art practices.
The Benefits of Subtractive Underpainting
Why should every artist incorporate this technique? The advantages are multifaceted, addressing common pitfalls in oil painting and enhancing overall outcomes.
- Establishes Strong Value Relationships Early: Value—the relative lightness or darkness—is the backbone of any painting. By starting with a dark base and subtracting for highlights, you lock in accurate contrasts from the outset, preventing the "muddy" buildup that occurs when layering colors without a solid foundation. As explained in Dan Schultz's fine art blog, this leads to paintings that "feel" right in terms of light and shadow.
- Enhances Luminosity and Depth: Subtractive underpainting creates an optical illusion of depth. The remaining dark tones provide a rich underglow, making overlaid colors appear more vibrant and translucent. This is especially useful for achieving atmospheric effects, like glowing sunsets or ethereal portraits.
- Simplifies the Process for Beginners: Unlike additive methods that require precise dark-to-light building, subtraction allows for quick corrections. Mistakes can be wiped away and reapplied, reducing frustration and building confidence.
- Saves Time and Materials: By resolving composition and values early, you avoid overworking later layers. This efficiency is praised in resources like Jackson's Art Blog, where underpainting is seen as a roadmap for the entire piece.
- Promotes Creative Freedom: Once the underpainting is set, color application becomes intuitive, allowing artists to experiment without fear of disrupting the structure.
Compared to additive underpainting—where you start light and add darker tones—subtractive offers superior control over highlights, as the canvas's natural white shines through unaltered. Additive can sometimes result in duller lights if overbuilt, while subtractive preserves purity.

Step-by-Step Guide to Subtractive Underpainting
Ready to try it? Here's a detailed walkthrough for an oil painting project.
- Prepare Your Materials: You'll need a primed canvas, oil paints (a dark earth tone like burnt umber or raw sienna for the base), odorless mineral spirits for thinning, brushes, a wipe-out tool or soft cloth, and a reference image.
- Tone the Canvas: Mix your base color with thinner to a watery consistency. Apply it evenly across the canvas using a large brush or roller. Let it dry slightly until tacky (about 10-30 minutes).
- Sketch the Composition: Lightly draw your subject with a soft pencil or thinned paint, focusing on major shapes rather than details.
- Subtract for Highlights: Using your wipe-out tool or a clean brush dipped in spirits, remove paint from areas that should be lighter. Work from broad masses to finer details, creating gradients by blending edges.
- Refine Values: Add more dark paint where needed for deeper shadows, then subtract again if overdone. Aim for a full range of values from dark to light.
- Dry and Layer: Allow the underpainting to dry (1-2 days), then apply opaque or glazed color layers on top, letting the underpainting guide your choices.
For visual inspiration, check out tutorials like this YouTube preview from Milan Art Institute, which demonstrates the process in real-time.
Essential Materials and Tools
- Paints: Professional-grade oils, such as those from Milan Art Store.
- Tools: A custom wipe-out tool (available here) for precise subtraction.
- Mediums: Odorless thinner for safe, fume-free work.
- Canvas: Gesso-primed for better adhesion.
Real-World Examples and Applications
Consider a landscape painting: Start with a burnt umber base, subtract for sunlit skies and foreground paths, then layer blues and greens for a vibrant scene. Artists like Thom Minnick on TikTok showcase how this creates quick, expressive underpaintings.
In portraiture, subtractive underpainting excels at rendering skin tones with subtle luminosity, as seen in Baroque masterpieces. Modern examples include wildlife art, where subtracted highlights bring fur or feathers to life.

Tips and Common Mistakes to Avoid
- Tip: Work in a well-ventilated space and use gloves to avoid skin contact with thinners.
- Tip: Experiment with base colors—warm tones for sunny scenes, cool for moody ones, as discussed in Mitchell Albala's guide.
- Mistake: Over-subtracting early; start broad and refine.
- Mistake: Rushing to color layers; ensure the underpainting is fully resolved.
- Tip: Practice on small panels to build speed and intuition.
Conclusion
Subtractive underpainting isn't just a technique—it's a mindset shift that prioritizes structure, luminosity, and efficiency. By mastering it, artists at any level can elevate their work, avoiding common pitfalls and unlocking new creative potentials. As the PaintingTube resource notes, this method was favored by masters for good reason: it delivers results that feel alive and professional. Dive in, experiment, and watch your paintings transform.
FAQ
What is subtractive underpainting? Subtractive underpainting is a technique where you apply a dark base layer of paint and remove sections to create lighter areas, establishing values before adding colors.
Why is it better than additive underpainting? It preserves the canvas's natural white for pure highlights, reduces muddiness, and allows easier corrections, leading to more luminous and depth-filled paintings.
What materials do I need to start? Basic oils in earth tones, a canvas, thinner, brushes, and a wipe-out tool. Check suppliers like Jerry's Artarama for recommendations.
Can beginners use this technique? Absolutely—it's forgiving and simplifies the process, making it ideal for newcomers to build confidence.
How long does it take to dry? The underpainting layer typically dries in 1-2 days, depending on thickness and environment.
Where can I learn more? Explore online resources like the Fearless Brush blog or enroll in courses at art institutes for hands-on guidance.
0 comments